
Telehealth Mobile App
As a Whitman-Walker patient, you will need three things to participate in telemedicine:
- An active Whitman-Walker Patient Portal account.
- An active email address to create your Patient Portal account — or to reset the password for your current Patient Portal account.
- Either a smartphone or a desktop computer with access to a microphone. If you have headphones with a built-in microphone, this will help you meet the microphone requirement. Click here for desktop instructions.
- New to using our Patient Portal? Click here and scroll down for instructions on setting up your account.
- New to video and audio telehealth visits? Learn the tools to navigate your Healow video or audio telehealth visit with this video tutorial.
- Already have an account and need to reset your username and/or password? Click here for instructions. See below for instructions on how to login to the app for the first time! If you already have an account and know your login information, start at Step 3.
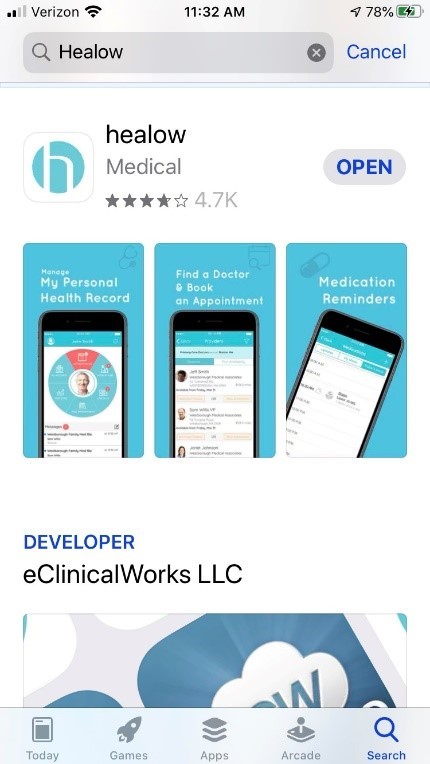
1. Search for and download the “Healow” app from the Google Play Store or the Apple App Store.
Click “Get Started” at the bottom of the homepage to begin.
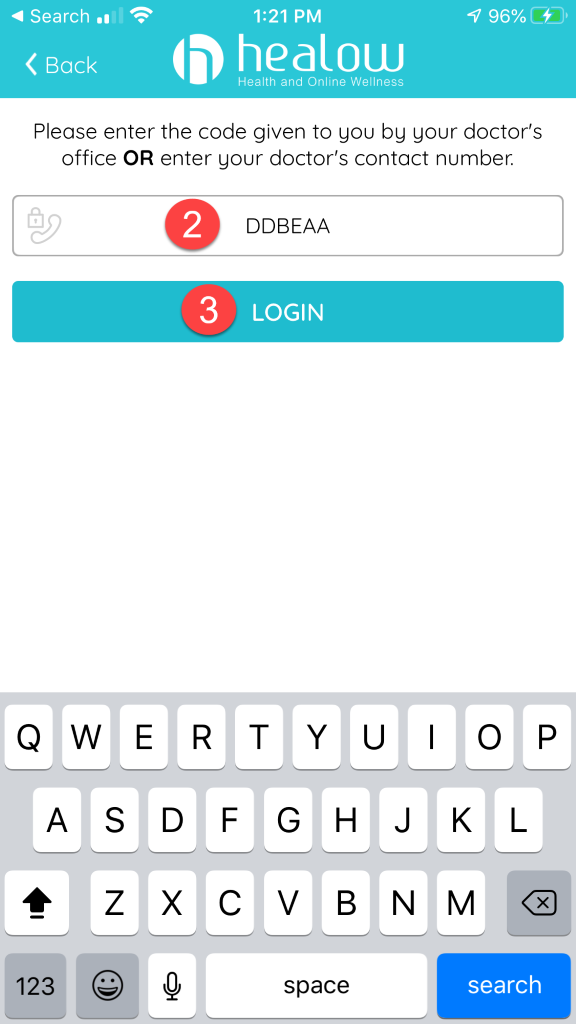
2. Next, type in Whitman-Walker’s unique Healow code: “DDBEAA.” Click “Login.”
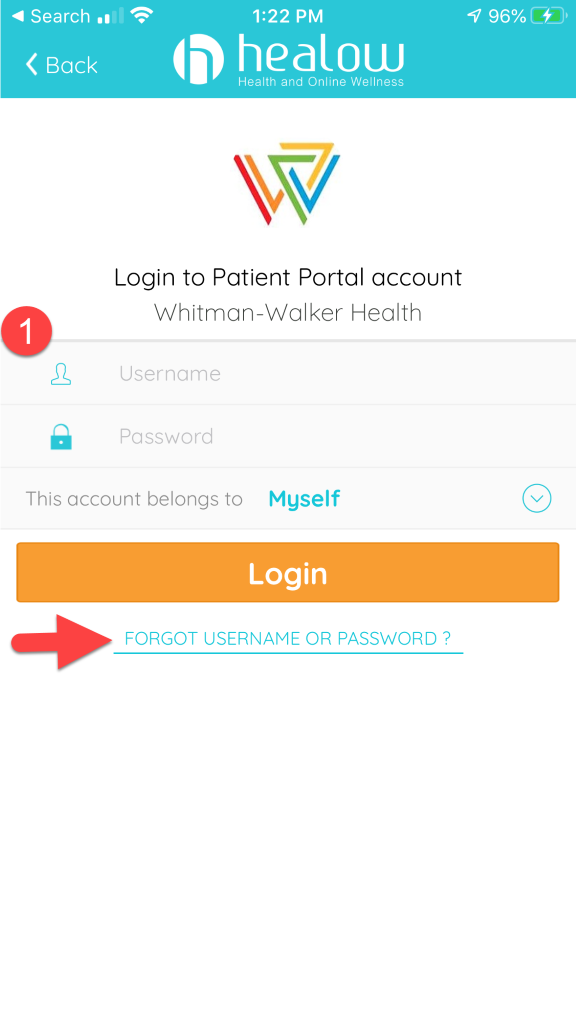
3. Then enter your Healow username and password, or click “FORGOT USERNAME OR PASSWORD.”
See instructions on how to reset your username and/or password here.
Lorem ipsum dolor sit amet, consectetur adipiscing elit. Ut elit tellus, luctus nec ullamcorper mattis, pulvinar dapibus leo.
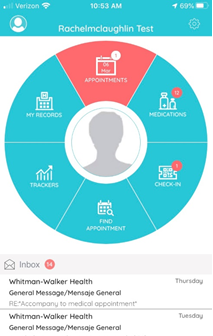
4. Once logged in, click on the “Appointments” tab.
If you have an appointment or visit to the health center scheduled in the near future, the tab will be highlighted red.
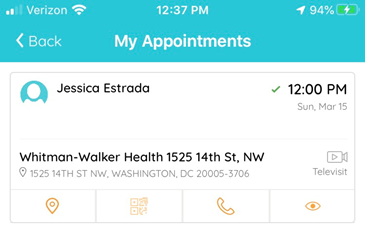
5. The next screen will show you the appointment details, including the provider’s name, and the date and time of your appointment.
You may have multiple appointments scheduled. Choose the telehealth appointment that you intend to join by clicking on your scheduled provider’s name.
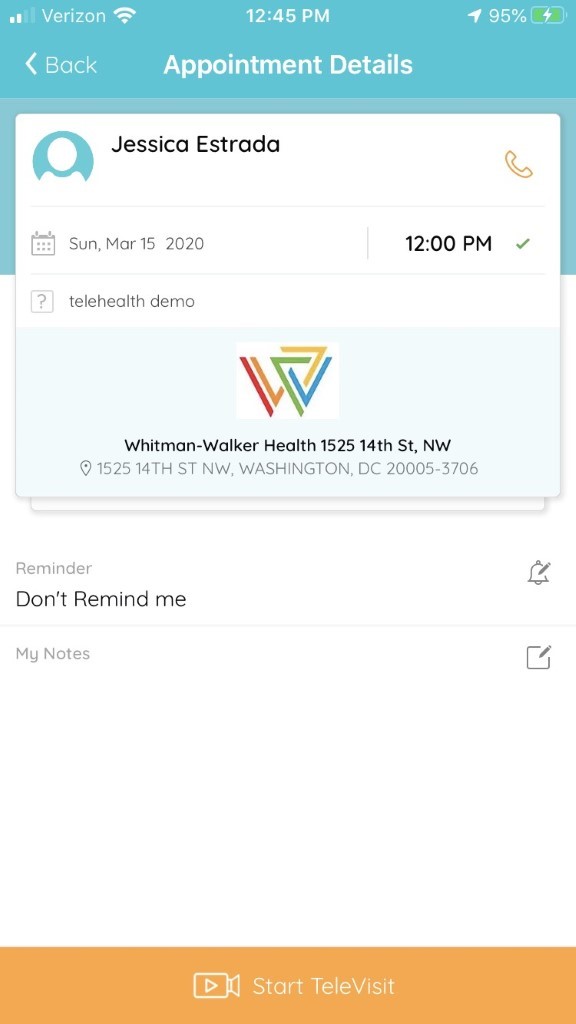
6. On the next screen, you can start your televisit.
Start by clicking on the orange bar at the bottom of the screen that reads “Start TeleVisit.”
7. The next screen is for “Vitals.“
You may skip this step just by clicking “Submit Vitals.”
If you can take your own vitals (with a personal blood pressure cuff for example), you may enter those numbers below. If not, leave it blank. Your provider
is aware.
- Enter your vitals, or leave it blank, being sure to scroll down as needed.
- Click “Submit Vitals.”
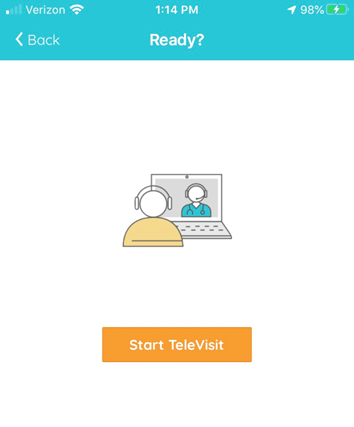
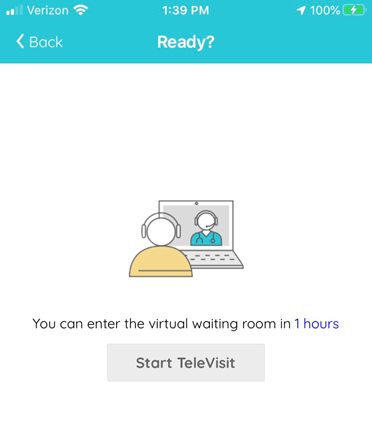
8. The next screen is called “Ready?” and it will give you the option to begin your televisit.
If you are ready to see and hear your provider — and to have your provider see and hear you — you can click the orange bar labeled “Start TeleVisit.”
When you click this orange bar, the provider sees an alert on their computer that you are available for the televisit to begin.
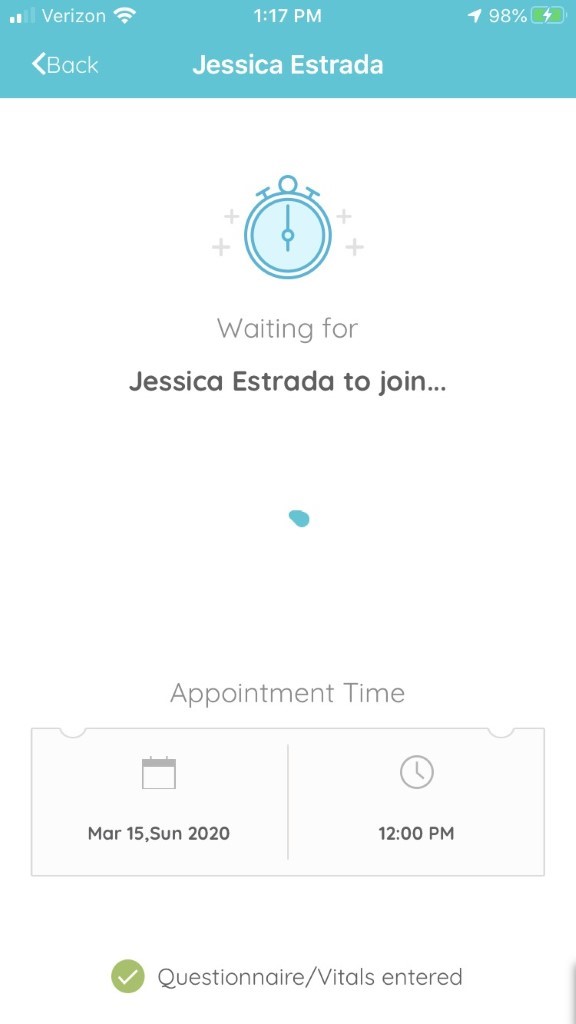
9. If there are 30 minutes or less before the scheduled start time of your appointment OR after your scheduled start time, you will see a note on the screen that says you are “Waiting for [your provider] to join.”
While this screen is displayed on your phone or desktop, your provider can see an alert on their screen that you
are ready for your televisit and that you are waiting for them to begin.
Please note your provider may need a few moments to finish up with another patient before starting your televisit.
10. If there are more than 30 minutes before the start time of your appointment you will see this screen.
Your provider will not be alerted that you are waiting for them if you see this screen as there is too much time
left before your scheduled appointment time.
The “Start TeleVisit” bar will be greyed out and unclickable.
Once it is within the 30-minute timeframe of your televisit, the greyed out bar will turn orange and then you will be able to click on it to begin your
visit.
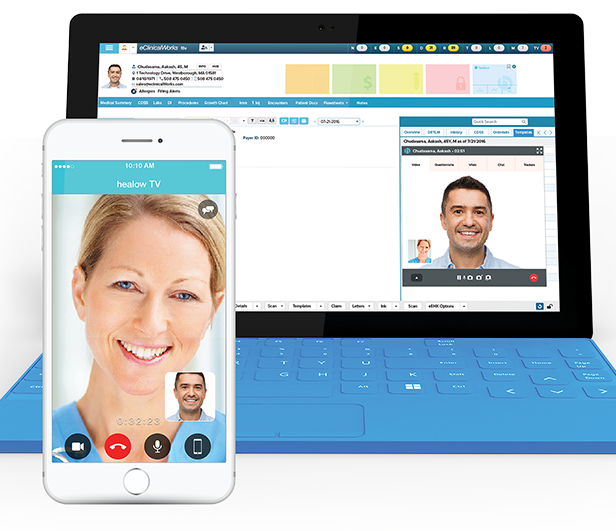
11. Once a provider joins the televisit, your screen on your phone will look like the image below.
Your provider’s image will appear in the large frame and your image will appear in the small frame in the lower right corner. Your provider sees the opposite
on their screen. They see a large image of you, a small image of themselves, and all of the medical information specific to you and your needs that
they would have access to in a typical, in-person visit.
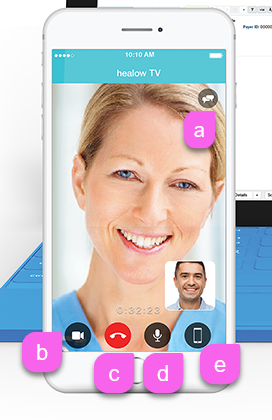
12. You will have a few options during your televisit.
a. You can send text messages to your provider by clicking the comment bubble icon. This is an option if your sound or video temporarily slows down or
pauses.
b. You can block the video/camera access by clicking the black button with a video camera icon on it. Clicking this button again will restore the video/camera
access.
c. You can END your televisit by clicking this red button with a phone icon on it.
d. You can mute the sound on your televisit by clicking this black button with a microphone icon on it. Clicking this button again will restore sound,
or un-mute, the televisit.
e. You can reverse the camera by clicking this button with a smartphone icon on it.For example, you may want to show your provider a rash that you have
on a part of your body that is not your face. Simply press this button to reverse the camera and show your provider what you would like them to examine.
Click this same button again to restore the camera view that is focused on your face.
Have a wonderful televisit and thank you for your patience as we navigate you and our staff through telehealth!