Desktop App
As a Whitman-Walker patient, you will need three things to participate in telemedicine:
- An active Whitman-Walker Patient Portal account.
- An active email address to create your Patient Portal account — or to reset the password for your current Patient Portal account.
- Either a smartphone or a desktop computer with access to a microphone. If you have headphones with a built-in microphone, this will help you meet the microphone requirement. Click here for desktop instructions.
- New to using our Patient Portal? Click here and scroll down for instructions on setting up your account.
- New to video and audio telehealth visits? Learn the tools to navigate your Healow video or audio telehealth visit with this video tutorial.
- Already have an account and need to reset your username and/or password? Click here for instructions. See below for instructions on how to login to the app for the first time! If you already have an account and know your login information, start at Step B.
A. To access video or audio Telehealth from a desktop computer and to login to your Patient Portal account, click here to start.
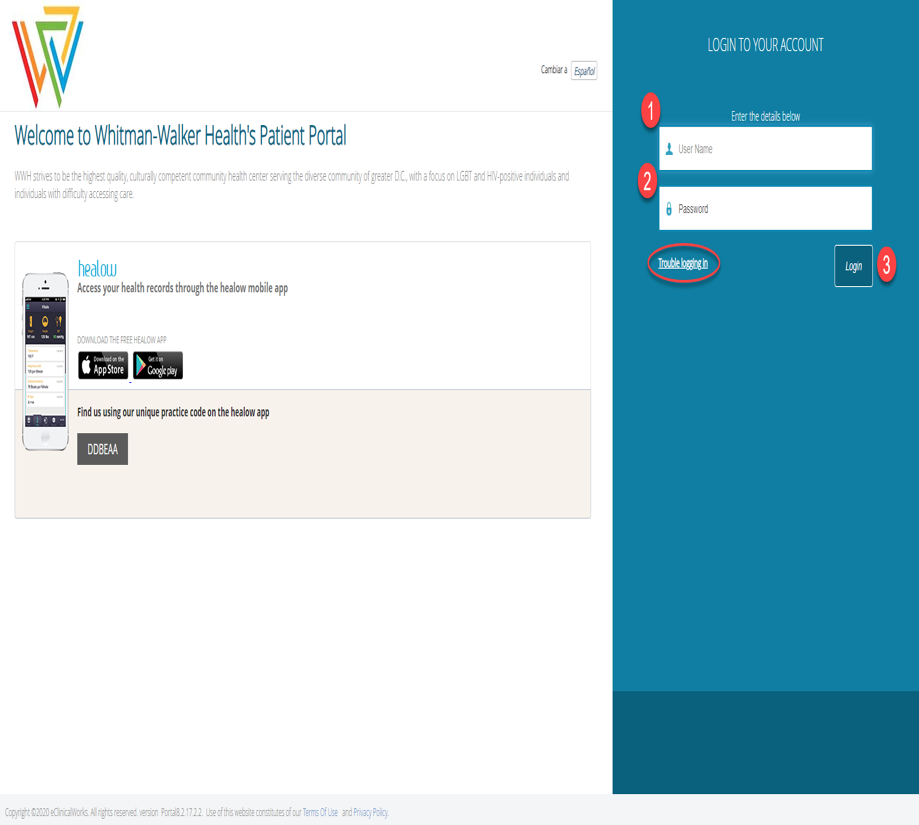
You should then see a screen that looks like the below image.
1. Enter your Username
2. Enter your Password
3. Then click “Login”
If you forgot your Username or Password, click “Trouble logging in”. Your “Username” is usually the email address associated with your patient account.
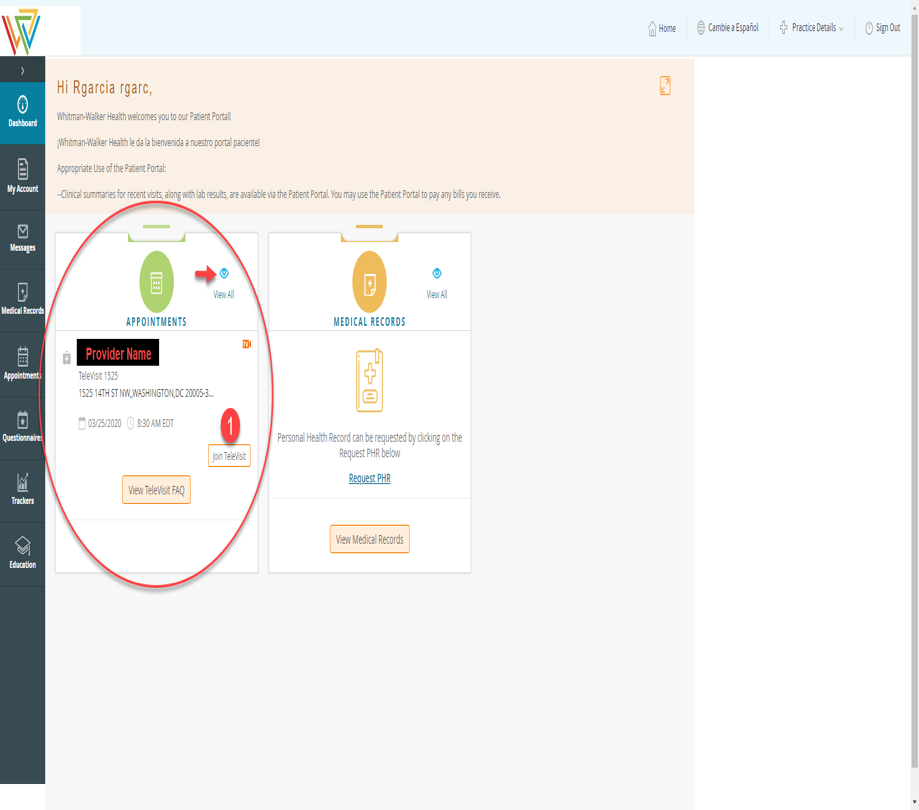
B. The top of the appointment will display your provider.
For example, you have a medical appointment with “Provider Name” on 3/25/24 at 8:30 a.m.
You can click the eye icon to “View All” and see the rest of your appointments for the day.
1. Click “Join Televisit” to get started
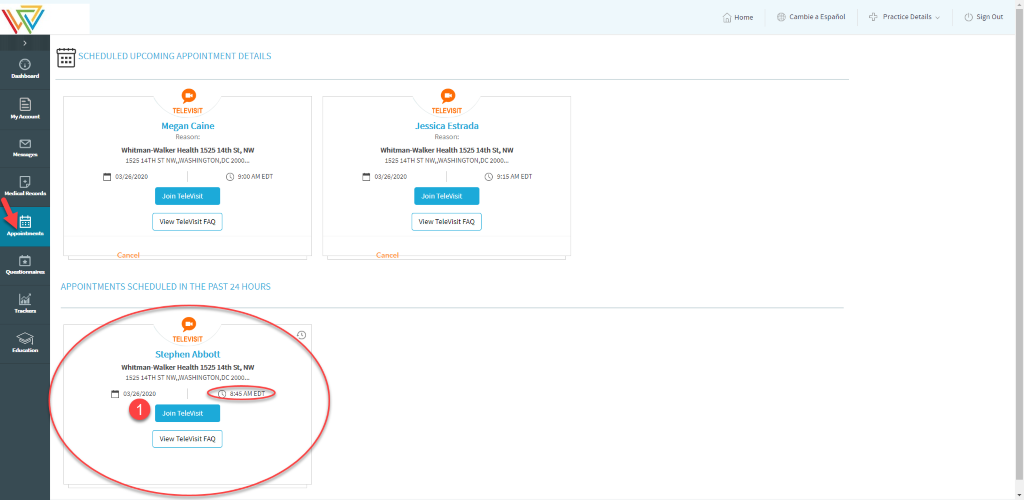
Here’s an example if you’re having trouble finding your appointment:
This patient has three appointments today, though only one was showing up on the previous screen because it was 1 minute after their 8:45 a.m. appointment,
so they could only see the next visit coming up at 9:00 a.m.
By clicking “Appointments” on the left, you are now able to see all of your scheduled visits.
From either this screen, or the previous “Dashboard” view, find the correct visit by confirming the date, time, and provider.
Then click “Join Televisit” to get started.
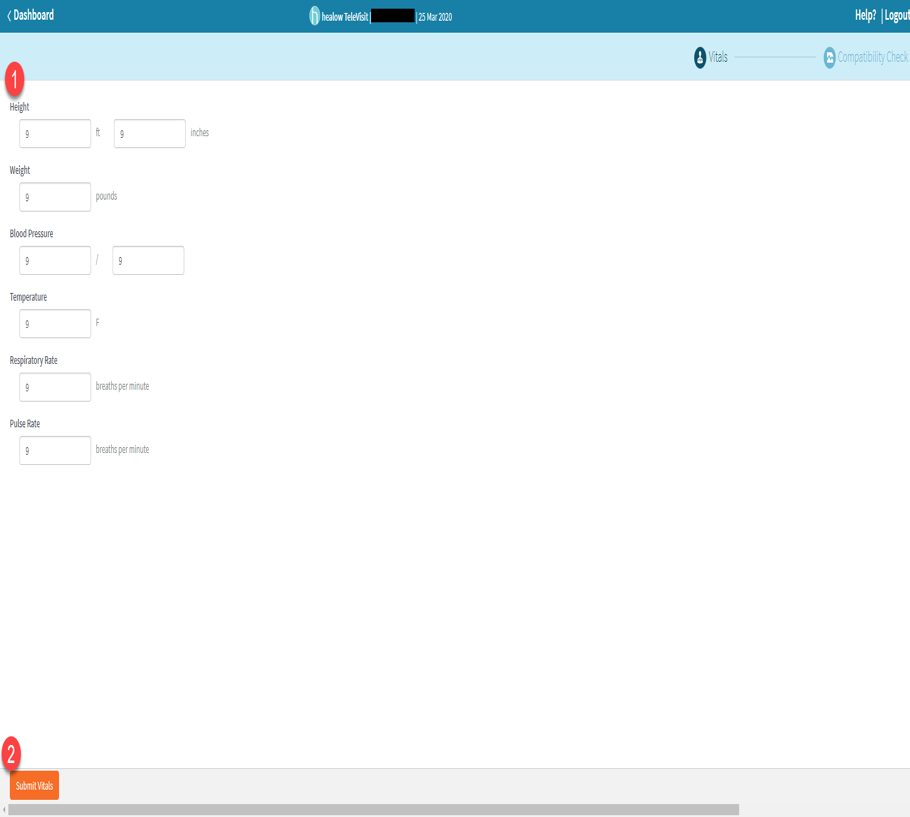
C. Next you will be asked to enter your Vitals.
You may skip this step just by clicking “Submit Vitals.”
If you can take your own vitals (with a personal blood pressure cuff for example), you may enter those numbers below. If not, leave it blank or enter a
single fake digit. Your provider is aware.
1. Enter your vitals, or leave it blank, being sure to scroll down as needed. In the example image below, we entered the fake digit of 9: Height: 9 Feet,
9 Inches Tall. Weight: 9 Pounds, etc.
2. Click “Submit Vitals.”
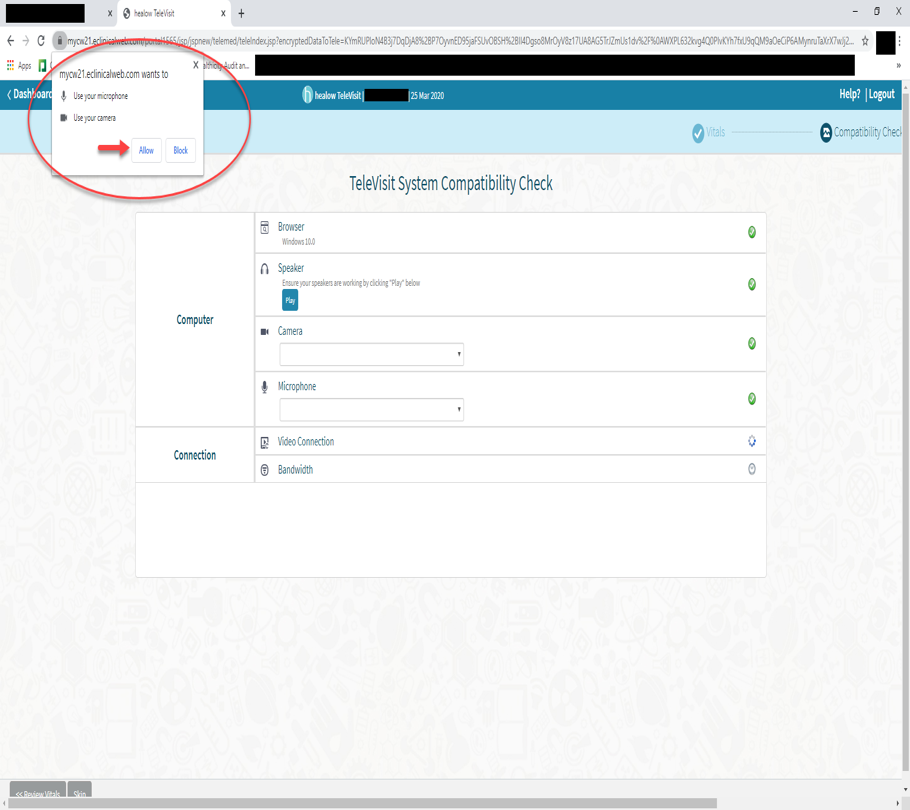
D. Next, the system will attempt to perform a “Televisit System Compatibility Check”
Please be sure to hit “Allow” if any pop-ups are requesting access to your camera and microphone. Televisits will not work without access to your computer’s
camera and microphone. If any of the compatibility checks fail (marked by a red “x”) please try and re-start your browser and computer. You may also
need to adjust your camera and/or microphone settings to allow access.
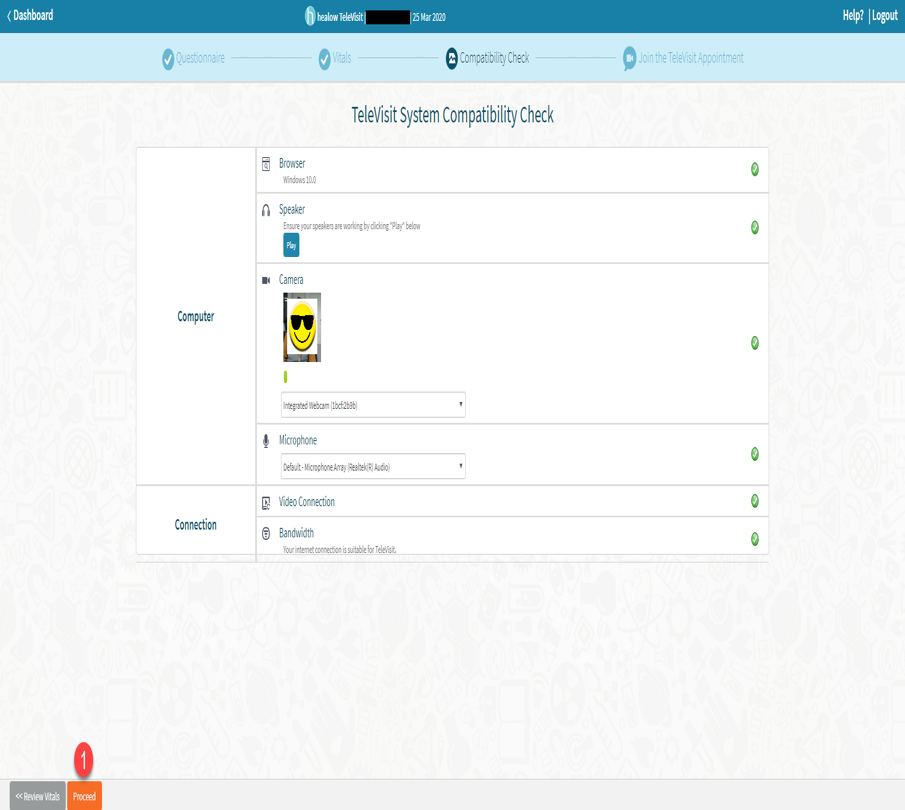
E. Once the Compatibility Check is complete, the next screen will display a thumbnail image of your camera view, and also register your microphone volume.
The system will also check your Video Connection and Bandwidth to ensure both have the capacity to handle the TeleVisit.
1. Click “Proceed” to continue.
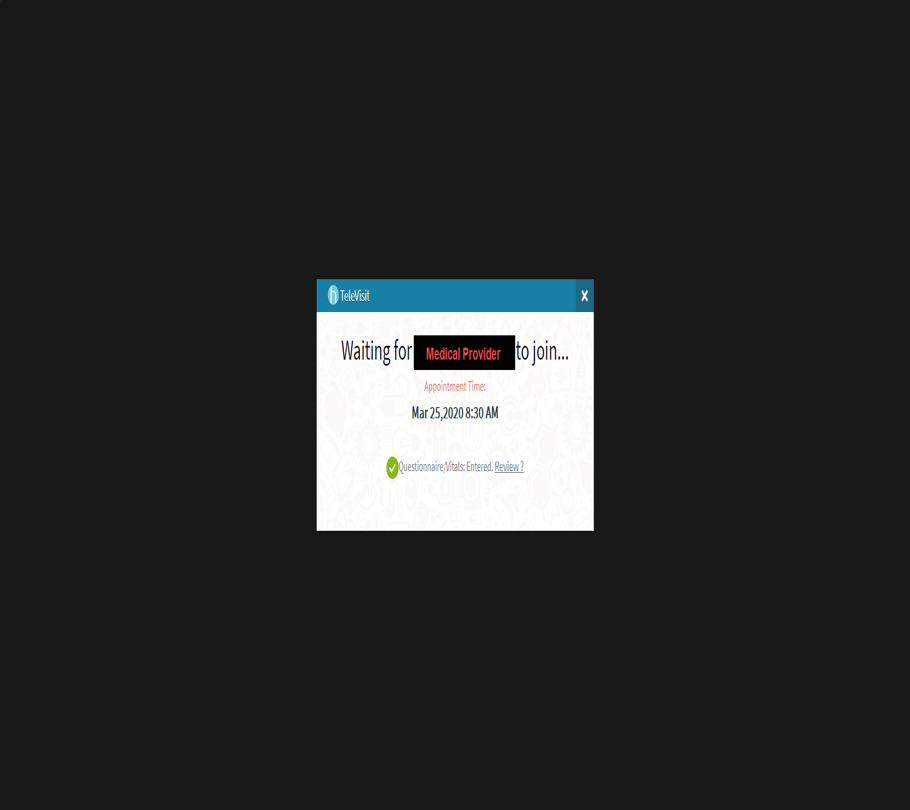
F. The next screen is called the “Virtual Waiting Room” and here you will wait for your provider to join the TeleVisit.
Your provider will receive an alert on their end letting them know you have arrived and to begin the Televisit.
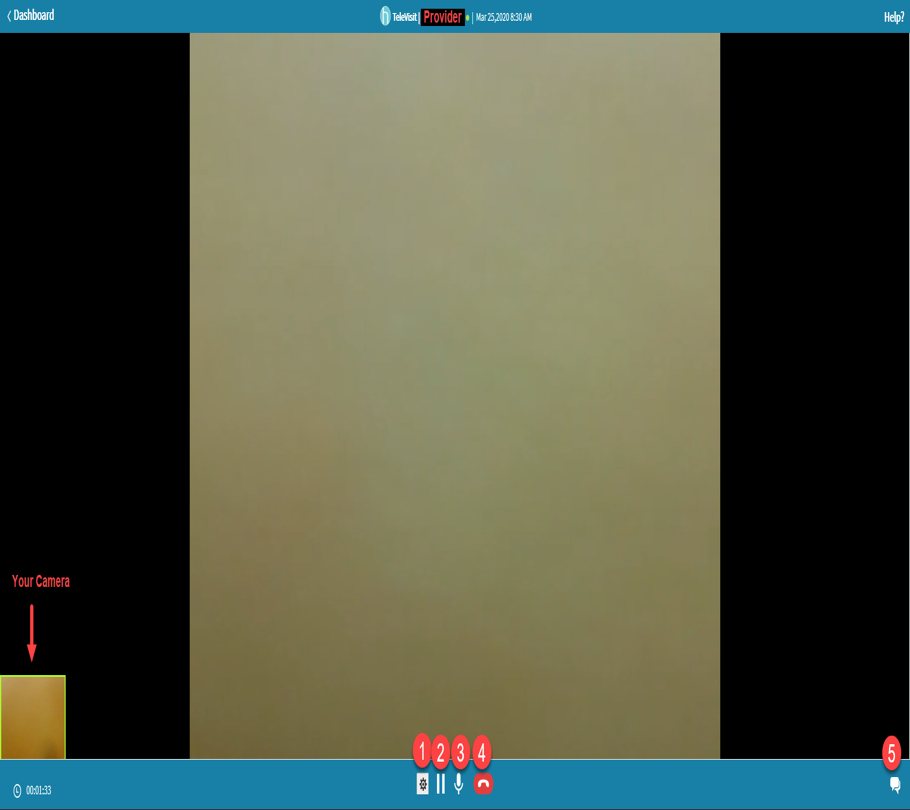
G. Once the provider joins the Televisit from their end, you will both be connected!
Your camera is displayed in the lower left side, and this screen has several options:
- Settings – Adjust display/video
- Pause – Pause the call
- Microphone – Mute/Un-mute
- Hang up – End the call
- Chat – Click here to send a chat message to your provider.
H. When the TeleVisit is over, click the red “Hang up” to end the call, and then click “Exit”.
If you accidentally hung up, click the blue “Cancel” button instead of “Exit”.

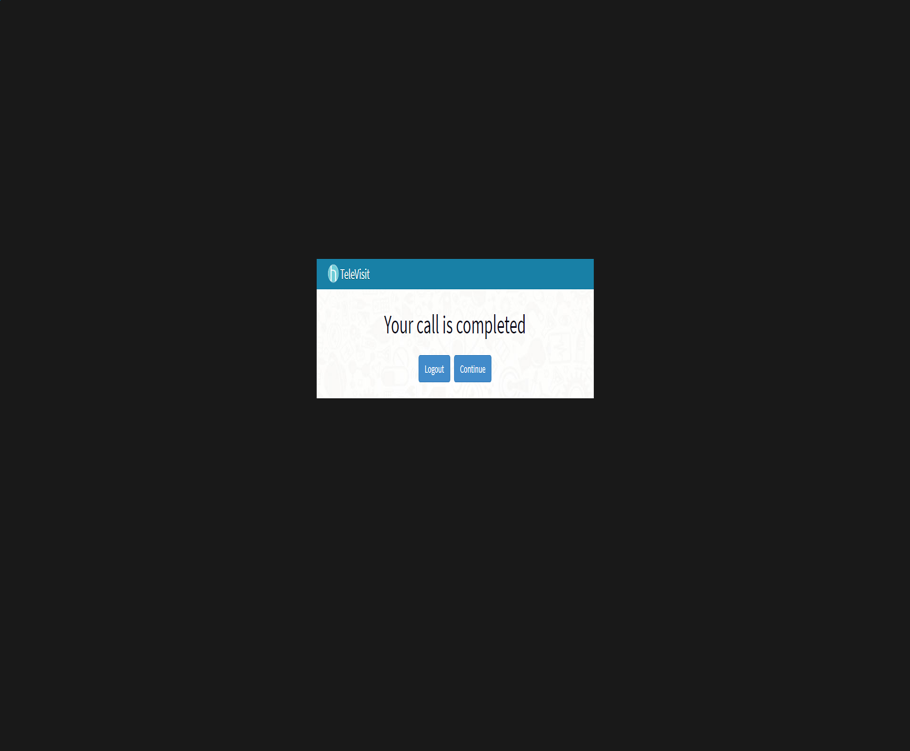
I. Your TeleVisit call is now complete.
You may click “Logout” to exit the Patient Portal” or click “Continue” if you have additional appointments or need to access anything else in the Portal.