
Telehealth – Email or Text Access
Whitman-Walker Health patients will need 3 things in order to participate in telemedicine.
As a Whitman-Walker patient, you will need:
- An active Whitman-Walker Patient Portal account.
- An active email address to create your Patient Portal account — or to reset the password for your current Patient Portal account.
- Either a smartphone or a desktop computer with access to a microphone. If you have headphones with a built-in microphone, this
will help you meet the microphone requirement. Click here for desktop instructions.
New to using our Patient Portal? Click here and scroll down for instructions
on setting up your account.
New to video and audio telehealth visits? Learn the tools to navigate your Healow video or audio telehealth visit with this
video tutorial.
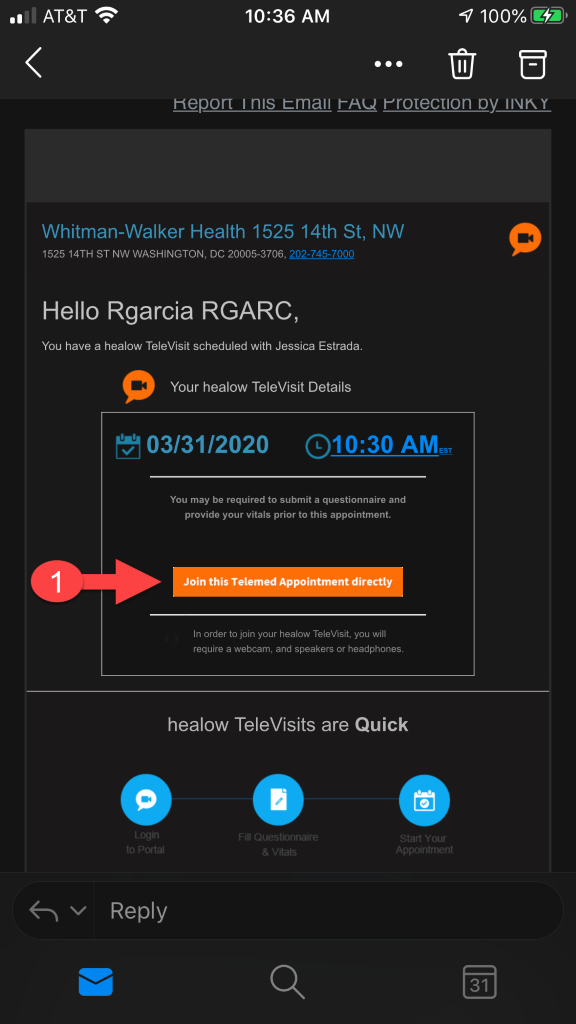
A. You will receive an email from “no-reply@eclinicalmail.com” or an SMS text with a link to join your TeleHealth appointment.*
You DO NOT need to login using the Healow app to access your appointment. Click the link in your email or SMS text and you will be taken directly
to the TeleHealth appointment
You DO NOT need to download the Healow App if you received this link. The email or SMS text will show your TeleHealth appointment date and
time, as well as your provider’s name.
Your email link is sent immediately after your scheduling and your SMS text link is sent 30 minutes prior to your appointment.
***Please be sure to check your spam folders if you do not receive this email link for your appointment.
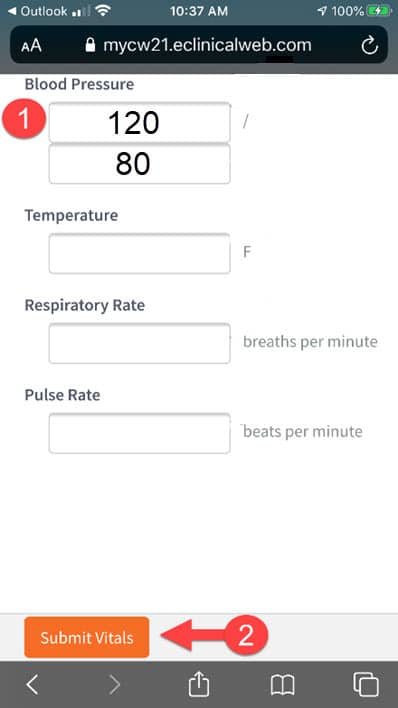
B. Next, you will be asked to enter your Vitals.
You may skip this step just by clicking “Submit Vitals.”
If you can take your own vitals (with a personal blood pressure cuff for example), you may enter those numbers below. If not, leave it blank. Your provider
is aware.
- Enter your vitals, or leave it blank, being sure to scroll down as needed.
- Click “Submit Vitals.”
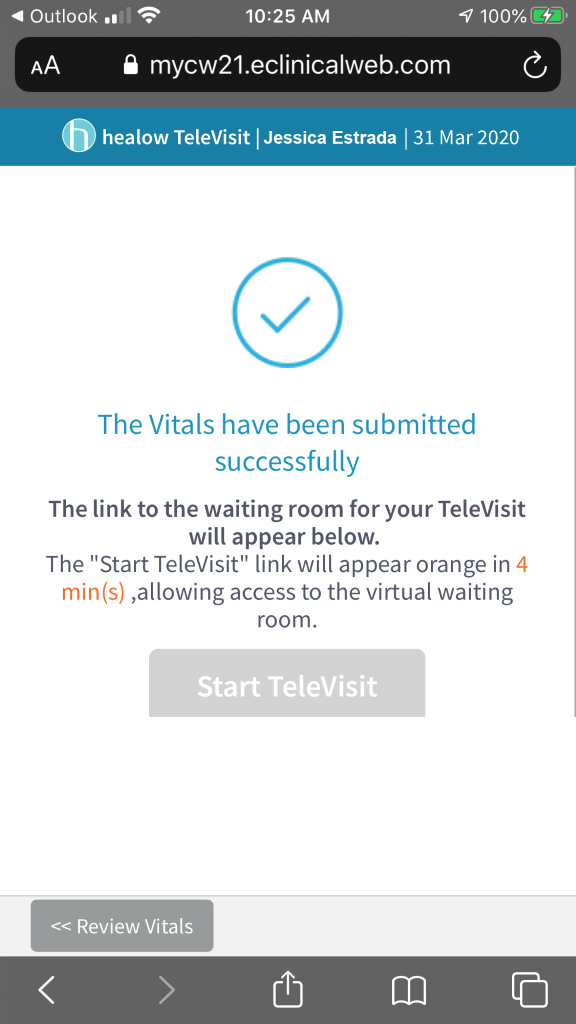
If there are more than 30 MINUTES before your scheduled appointment, you will not be able to check-in yet and the “Start TeleVisit” button will be greyed out. See the example image below.
The link will count down the minutes and turn orange when you are able to check-in.
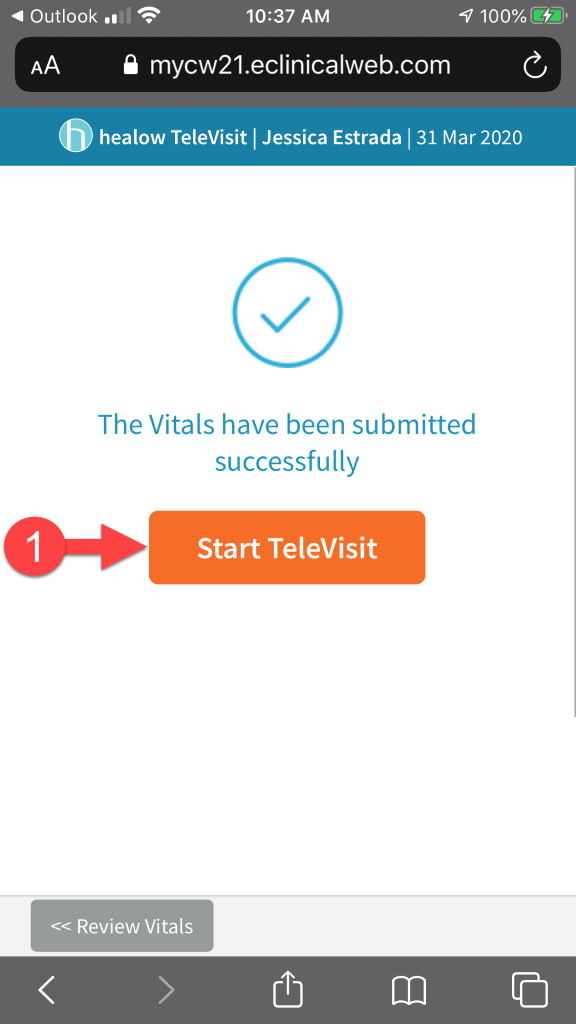
C. Now that it is within 30 minutes of your appointment, you are now able to check-in.
1. Click “Start Televisit.”
Please note your provider may not be available early, so be sure to check back when it’s time for your appointment.
D. After your click “Start TeleVisit” you will now be taken to the virtual waiting room.
Your provider will receive a message letting them know you’ve checked-in for your appointment.
Your provider and appointment date/time will be listed on the screen.
- At this point, your phone browser window may switch directions so be sure to turn your phone to “Landscape” or “Longways” to get a full view of the
screen.

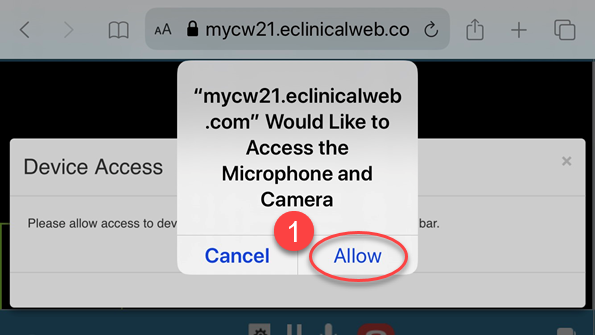
E. Next, your phone will request permission from the browser to access your phone’s Microphone and Camera in order to begin the TeleVisit.
- Click Allow
F. After you click “Allow” and your provider joins the call, this next screen shows your TeleVisit in progress:
- A. Your Provider’s Name
- B. Settings (flip camera)
- C. Pause video
- D. Mute/un-mute microphone
- E. Chat
- F. Call-time length
- G. End call

G. You may need to adjust your screen to see your camera fully.
- If your camera view is squished to the side
- Scroll to the right to bring the entire window into view
